Fish Creek Spinner Zonker Spinnerbaits Fish Creek Spinners Armadillo Trout Spinners 1/5oz Glass Armadillos Fish Creek Spinners large fishing spinners Fish Creek Spinners Walleye Rigs

Tuesday, August 23, 2011

How to Powder Coat Spinner components with a Powder Spray Gun

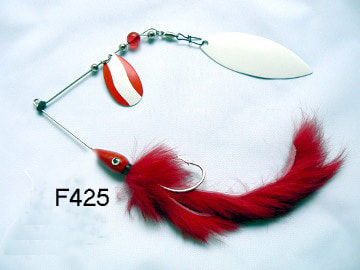
Powder painting Spinner Parts with the Badger 260 gun

More lessons updated Post - Hot Drop Powder Coating

Spinner sales for this season are winding down, schools back in session and retailers are starting to think about hunting seasons.

Stop by Fish Creek Spinners Web Store and checkout it's new format and many of these paint jobs!

I decided to invest in some new assets and start building some new skills, so... I bought a Badger 260 powder spray gun, it's a simple little thing. It was designed for spraying abrasives to etch glass, but does a good job with the powder paint. Guess I could even use it to sand blast my old trucks nasty fouled Number 1 spark plug. I also bought some powder paint by the pound and some vinyl paints.

First off, I needed an air compressor and regulator to provide the spray power. I did quite a lot of Googling  and learned a bit about air compressors - PSI and CFM, Regulators, Filters with bayonet bleeds, Piston or Diaphram stuff. Trust me, I'd opened a blast furnace door.

Yikes! I asked questions on forums, The tool guys got quiet. I even asked the paint people, I thought they would know. No help to be found and that was disappointing. The specs listed with the spray gun were not matching up with specs on compressors. All sorts of paint and no air. Luckily, I called Badger and they were helpful straightening out the misleading PSIspecs on the Powder painting documentation.

I rolled the dice and chose a SparMax TC-2000 to run the PSG and any other airbrush painting applications that Ben might have for his hand-carved lures.

With the right accessory tools, this baby will spray you tan. It will decorate cakes. It will run a tattoo gun. Even sand-blast. Finally, in practice, the TC-2000 and Badger 260 will paint spinner parts.


Problem Statement - lumpy bodies

If you've been to the blog before, you know I've been dipping the muskie bodies. Heat, dip in powder paint, and cure. Got my process together in that space. Tried and True.

But I've experienced some amount of difficulty getting the coverage right and ruined a few too many paint jobs coming out of the oven (they drip and end up with lumps). Lumpy bodies, not good. Frustrating waste and time-consuming rework.

It seemed to me that batches of powder paint, coming from the factory, had different properties. Inconsistent mix ratios, milling or something causes different sensitivity to heat and different paint adherence behaviors.

Yeah right, anyways, for me, the differences showed up when I changed to a new color. Either that or this was a liveware problem of mine!

Even though I strove to be consistent with heat, fluffed the paint and whisked the part, some colors coated too thick and others didn't.

Whew, long winded right? Get back to the Pink Parts and Hard bodies. Ok, here's some pictures.

First Hard bodies - brass and nickel

Hard bodies - brass and nickel - various types and weights

Dip painted ancestors


So, now a look at the new Assets

Badger 260 Powder Spray Gun (PSG) - eloquent in its simplicity

Badger 260 Powder Spray Gun


R2D2 - I mean, SparMax TC-2000 compressor
Ok, back to the skills.

My tried and true process needed to evolve to accommodate the new tools. This meant I'd get to solve new problems and hit a few ditches (unfortunately, my learning strategy and the way I learn).

The first was catching the over spray. I did several iterations on this and it's a secret. Let me just say that necessity, is the mother of invention.

Pink and mustard colored clouds coming out of the garage and a mustard colored CRV were frowned on by Marie, so we put our best minds to work and stumbled on a solution.

Pro-Tec Pink Cloud maker
Next was batching the parts. I have plenty of stainless wire, so I strung the hard bodies on 8 inch wires, making some cool spinner kabob looking rigs. I sized these to accommodate the oven and also the makeshift spray booth.

Spinner body kabobs ready for the oven

Paint station - notice the leather glove - kabobs are HOT! 
So there you have it - Heat the kabobs in the oven - take em out with a leather glove - spray on the paint while rolling the wire, using those holes in the base like an axle to rotate the hot parts and let the spray evenly cover them. I had to crank up the oven and let them sit awhile in order to get them hot enough. You'll know they're good, when the paint stops blasting past the parts and adheres.

I found 30 PSI worked best, not the 5-8 PSI the paint doc stated. So I set the regulator to that PSI and concentrated on not breathing for 20 minutes. Just kidding!

You'll need a Respirator... or you'll tie dye your kleenex tissues -  Yuk...
Here's some finished parts
Bodies galore - Dinner Bells, AngleIrons, Metal Armadillos and Fireant wings
Here's a couple Dinnerbells with the pink parts! Fun, Fun, Fun! 


Hopefully, someone fishing Pink Salmon on the West Coast will want to get some FCS wet! 

I know the mustard AngleIrons are wanted for Smallies in North Carolina. Propeller FireAnts will find a home in New Jersey!

Time to replenish some low inventory!

Overall, I'm pleased with the outcome and look forward to doing better more frequent small batches as I need them. 

Feel free to comment with your experiences or offer suggestions. My process was kind of a shoot from the hip response and I'll be refining it with iteration and trying more paints.

Sunday, August 21, 2011

Copper Harbor - UP Agates

Here's a couple shots from a trip Marie and I took across the northern border of Michigan's Upper Peninsula and Lake Superior's Southern Shore at Copper Harbor.

Copper Harbor sunset -

Copper Harbor Cruiser and Loon Guard


And a closeup of the South shore agates by the millions. Got a batch in the rock tumbler in the basement right now.


Lake Superior South Shore Agates


Copper Harbor, Michigan

It's a Beautiful isolated and relaxing place.

Forever Fishin Doug - Washington Tiger Muskie on Hula Girl

Doug Porter author of the Forever Fishing Washington State blog (and a persistent FCS slinger), caught this 41.5 inch tiger at Merwin Reservoir in Eastern Washington on a Fish Creek Hula Girl spinner.

Thanks for sharing the pictures Doug!

Don't it make you want to go Muskie FishIN?

Muskie In ... the Net!

Muskie In ... the Boat!

Muskie In ... the Hand. Ouch!


Muskie Back in ... the Water!


This Tiger Muskie was caught on a black and brass Hula girl spinner like this one.


Here's another Washington Muskie caught early this year with a similar Hula spinner on the West side of Washington by Dean Pratt, fishing with Yankin Jaw Guide Service.


This one with Nickel Colorado blades

1oz Black and Silver Hula Spinner that caught the western Washington Tiger Muskie

Get em' in the water and they bring back fish! My thanks to both anglers for sharing their successes.

Stop by Fish Creek Spinners Web Store and checkout it's new format!

Friday, August 12, 2011

August drawing - Season Finale

Here's todays drawing entries and Random.org outcome -


Entry NoIDSourceOutcome
1seanodFE
2SmeeseHSO
3manleyfisherFE
4MarkBlogger
5brookfieldanglerBlogger
6nmfishnFE
7bhunt63WALakes
8ManuelFE
9The NothingBloggerWinner


Nine total entries from three fishing forums, with three bloggers in the drawing this month.

'The Nothing' from website Yak Fish won this months set of spinners, coming in under the wire to enter last night! I'll get an email off to him to get mailing information. Stop by his blog to see how the spinners did after he gets them wet!

Stop by Fish Creek Spinners Web Store and checkout it's new format!

Thanks everyone for your participation. Although I was thinking this was the last drawing this year, I may do a batch of archery and bullet spinners as hunting season approaches to finish off the year with a blast!

Stop back and signup.

Package will integrate some duolock enhancements.


August drawing lures.

1oz Fluor Orange Dinnerbell Squid with a perch skirt - #2/0 treble
2oz+ Fluor Orange closed loop Spinnerbait - Buzz blade with Gold main blade
1/2oz Skirt chaser/leader/lure - Gold Blade - Natural Bucktail - #2 treble


Comment the blog post to enter. If you use Anonymous, you must leave a Forum with Forum ID or an email address to be in order to participate and be contacted if you win. If omitted, the entry won't be included.

Wait it out if you're feelin lucky and want some big spinners for free - if not, use the AUGBLOG code in the webstore at checkout to get a 35% discount on your orders. Good for everything and anything in the store - now til August 31st. 35% is like - if you buy 3, 1 of them was free.

Seems the chance for free stuff is intriguing, sooo. Every $25+ order using the code will get some free stuff. Fishing stuff that is. I'm not going to send you some old telephone cords or old remotes (got plenty of them though).

You might get sweet unusual spinners, you might get spoons, you might get something custom.

Roll the dice, for a surprise in your mailbox!

Tuesday, August 9, 2011

Dressing up Spinnerbaits

Once upon a time, I added a stinger to a zonker spinnerbait and good things happened. The outcome took me by surprise and ever since, I've been contemplating other ways to change things up and add flexibility.

I believe my spinnerbait success with big trout in fast water chutes were because the stinger had a white pvc tube that had an enticing side to side motion while the spinnerbait's weight and action hovered in the strong current.

Big fish lurking in the oxygen rich current took notice and came out to get it. This started me thinking deep thoughts.

Although that example was with 1oz zonker bait, I wanted something that could work on the big guns - the 2oz+ closed loop spinnerbaits - suitable for Muskie and Saltwater species. Also the bigger muskie and Salmon spinners that used the same silicon skirts.

I came up with a 35# cable attached bucktail and then decided to pimp it out with a spinner blade and a couple beads. Here's a few lined up for inspection.

Bucktail Skirt Chasers

The first adaptations were cable connected with pressed sleeves and were there to stay. That seemed like a decent idea, until I wanted to swap out a skirt.

The same dilema occurred on the big spinners. I needed a way to swap skirts - either by preference or because of wear. Big fish teeth are tough on silicon. I had to make the stingers removable in order to change a skirt. Eureka! If they were removable, they became accessories you could remove, change or swap out.

To make them removable I had two choices - splitrings or something else. Splitrings were the most apparent choice, but splitrings can be a pain, literally - when using them with sharp hooks in cramped quarters, you can pierce a finger or thumb. I opted for duolock clasps.


I've started using them for hook attachments on the big spinners as well.


This has several advantages. First you can swap out hooks based on your preference. Next, you can remove the duolock and now change silicon skirts on the big spinners and spinnerbaits with little difficulty. Finally, if you need to cut loose a hook on a stressed out fish, you can easily cut the duolock.

Removing a hook from a splitring or cutting a big treble is tricky, cutting a duolock is less hectic.

Notice the example above went a step further and uses a .041in short shaft wire between the duolock and treble. The wire connector can be cut and avoid messing with the duolock.

The juries still out on their performance but I'm pretty stoked with the improvement and its resulting flexibility. Suddenly, you can easily accessorize and tranform both the spinners and spinnerbaits with changible extensions using duolock clasps. Open, Swap, Close. Fresh new look.

Granted these are big baits for big species and at the moment I haven't tried to adapt the idea on smaller tackle, but stay tuned.

Here's a few pictures. Mix and match parts scattered around the table. 1oz Double blade spinner in the center. Skirts, hooks, blades, bucktails and skirt chasers ring the center.


Because the spinner didn't have a permanent hook attachment, I was able to slide a new skirt over the tail loop and skirt mount without any problem.


Now added the duolock clasp to finish hooking the spinner up.


Added a #2/0 treble and a skirt chaser and closed the duolock.


Changed my mind and put a different stinger on it.


Here's a video using a spinnerbait in a similar build and transform operation.


Pretty easy to interchange parts to get new interesting looking creations - FrankenSpinners!

Ben and I will be fishing these to get the kinks out of them, but I expect I'll put a few out in the webstore afterwards.

Stop by Fish Creek Spinners Web Store and checkout it's new format!

I'm interested in your comments and observations if using duolock clasps for other purposes. Feel free to comment to blog or drop me an email to fishcreekspinners@gmail.com